
Thanksgiving is one of my favorite times of the year in our classroom! Below, you will find some of the activities we do in November such as crafts, Mr. Turkey disguises, and diy Indian/Pilgrim costumes for our Thanksgiving program.
Here is a Pilgrim girl and boy activity that we did this year. I had all the pieces pre cut for my kinderkats, and they assembled them. I have two versions of sentences, but my class did the "I am thankful for..." I will post the sentence pages on my TPT soon as a FREEBIE for you!


Here is our teepee and Indian symbols posters:


Here are a few November crafts that my kinderkats make:


Each year, I do an activity that many teachers do this time of year....send home Mr. Turkey to be disguised so he won't be eaten for Thanksgiving dinner. Below are some turkey disguises that my students have created with their families.


Our kindergarten classes have a Thanksgiving performance each year before turkey day, and we learn several songs, poems, and stories for the event. I'll try to post what we sing, say and do when I get a chance. The best part of the whole thing, is that we get to dress like Pilgrims on one day and Indians the next day. I usually order my boy Pilgrim hats from Oriental Trading, but they were out of stock...so I decided to make my own NO SEW Pilgrim boy hats and my usual NO SEW PILGRIM GIRL HATS too. You could always take the same info below and sew them together, but I'm not proficient at sewing......so I decided to hot glue everything. Here are a few pictures below of how the finished product looked. They turned out pretty good. I have directions and pictures of all the costumes below.
Here is a Pilgrim girl and boy activity that we did this year. I had all the pieces pre cut for my kinderkats, and they assembled them. I have two versions of sentences, but my class did the "I am thankful for..." I will post the sentence pages on my TPT soon as a FREEBIE for you!
Here is our teepee and Indian symbols posters:
Here are a few November crafts that my kinderkats make:
Each year, I do an activity that many teachers do this time of year....send home Mr. Turkey to be disguised so he won't be eaten for Thanksgiving dinner. Below are some turkey disguises that my students have created with their families.
Our kindergarten classes have a Thanksgiving performance each year before turkey day, and we learn several songs, poems, and stories for the event. I'll try to post what we sing, say and do when I get a chance. The best part of the whole thing, is that we get to dress like Pilgrims on one day and Indians the next day. I usually order my boy Pilgrim hats from Oriental Trading, but they were out of stock...so I decided to make my own NO SEW Pilgrim boy hats and my usual NO SEW PILGRIM GIRL HATS too. You could always take the same info below and sew them together, but I'm not proficient at sewing......so I decided to hot glue everything. Here are a few pictures below of how the finished product looked. They turned out pretty good. I have directions and pictures of all the costumes below.

First, I bought 1 yard of black felt fabric, 1 (8 1/2 X 11) sheet of white felt, and 1 (8 1/2 X 11) sheet
of brown felt. This will make 6 hats. I took a hat from Oriental trading that was left over from last
year, turned it inside out, and traced out a pattern. I've listed measurements below so you won't have
to worry about having something to trace.

About 18 1/2 inches across bottom

4 inches on each bottom side
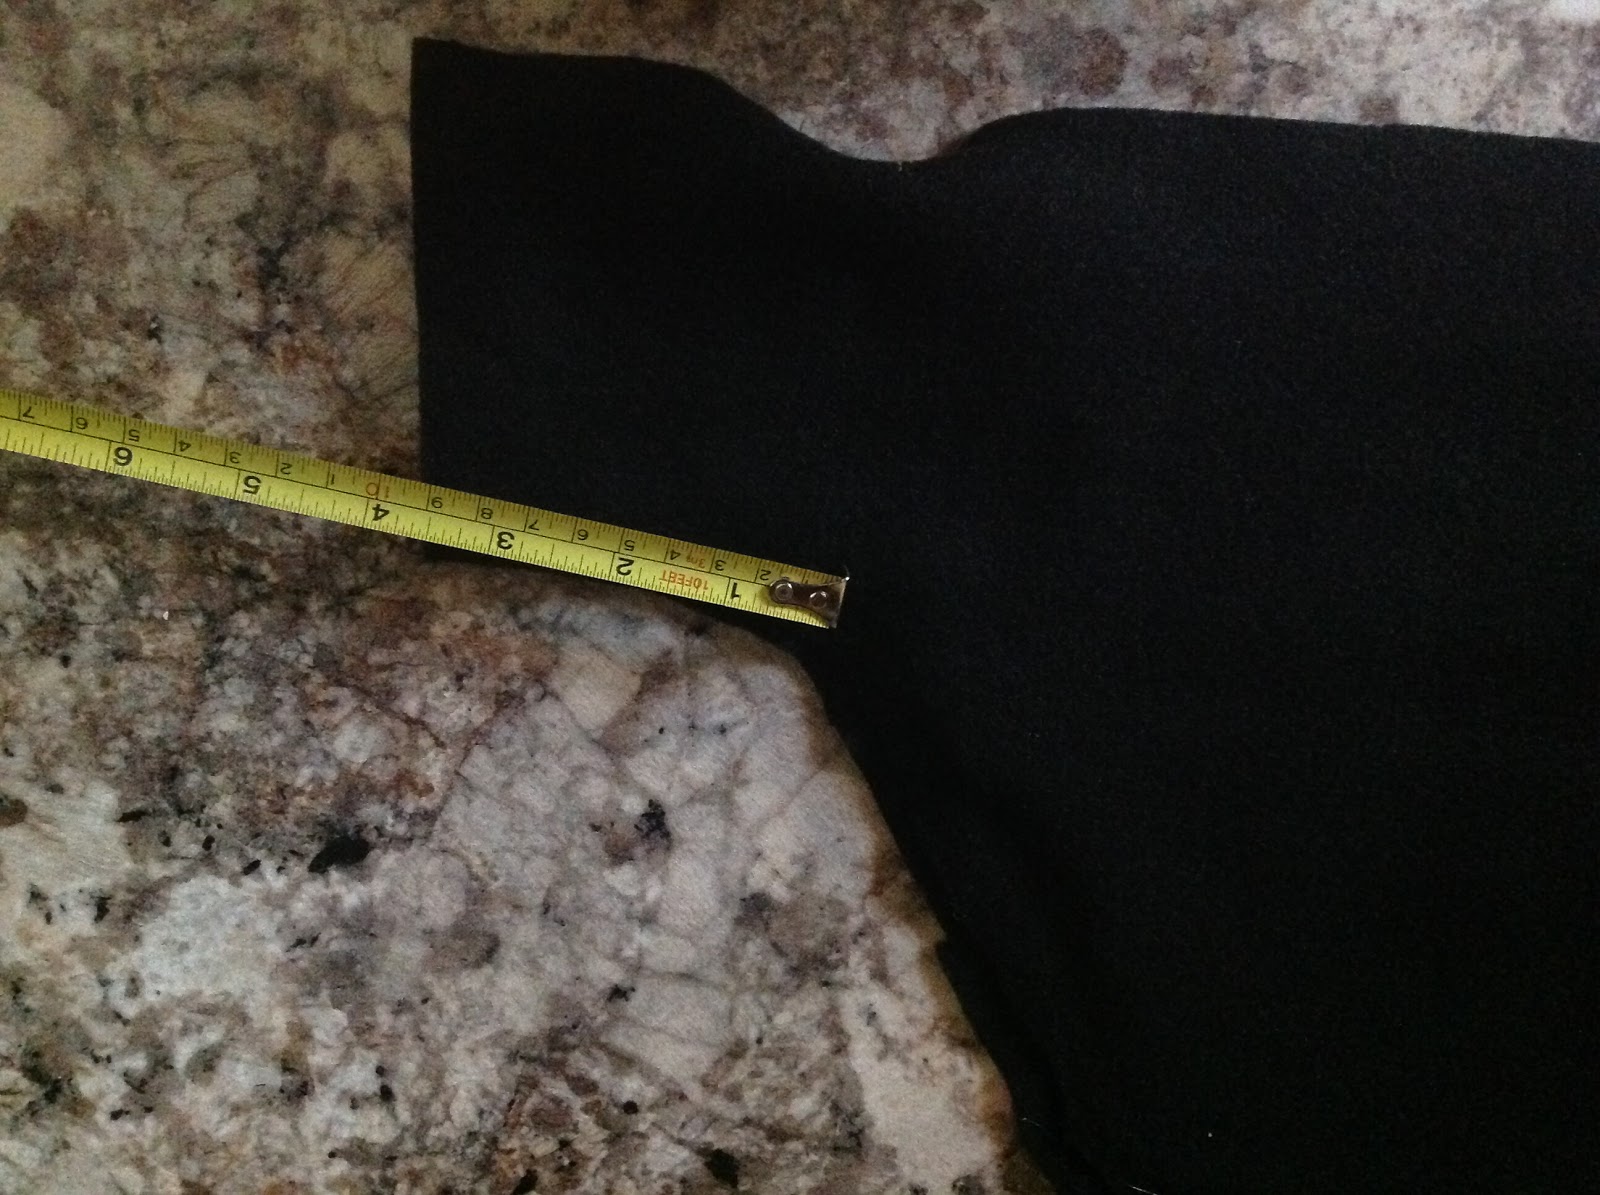
About 3 1/2 inches across

About 6 1/2 inches on top

The brown strip is about 10 1/2 inches long (fold/cut as needed)
The white buckle is about 4 inches across and there is about a 2 inch wide opening

The brown strip is about 1 1/2 inch tall
The white buckle is about 3 1/2 inches tall with an opening that is about 1 1/2 inches tall

About 7 inches top sides
 Hot glue front and back pieces together 
Another hot glue image
|
| You will need to cut out two pieces of the black felt for each hat, so you will have a front and a back. Hot glue the two pieces together around the outside edge of the pattern until you get to the bottom section. I hot glued about 2 inches on each bottom side together to leave an opening so it could fit on a child's head. I used my son as the guinea pig to help figure out size of opening. The good thing about hot gluing is you can undo it and try again. |
After gluing the two black pieces together, I let it dry and then turned it inside out (which will now be
the right side). Glue the brown strip and white buckle on while it is turned inside out, and SCORE!
You just finished your Pilgrim boy no sew hat.
PILGRIM GIRL NO SEW BONNET AND NO SEW COLLARS FOR BOYS & GIRLS
First, I bought about 5 yards of the cheapest white fabric I could find. Then I cut (using $20 pinking shears to prevent unraveling) the fabric into about 30 12"X18" pieces. 30 pieces gave me enough to make 10 girl bonnets and 20 collars for boys/girls. The bonnets and collars all begin as the same size 12"x18" pieces.

This is an image of a 12"x18" inch piece
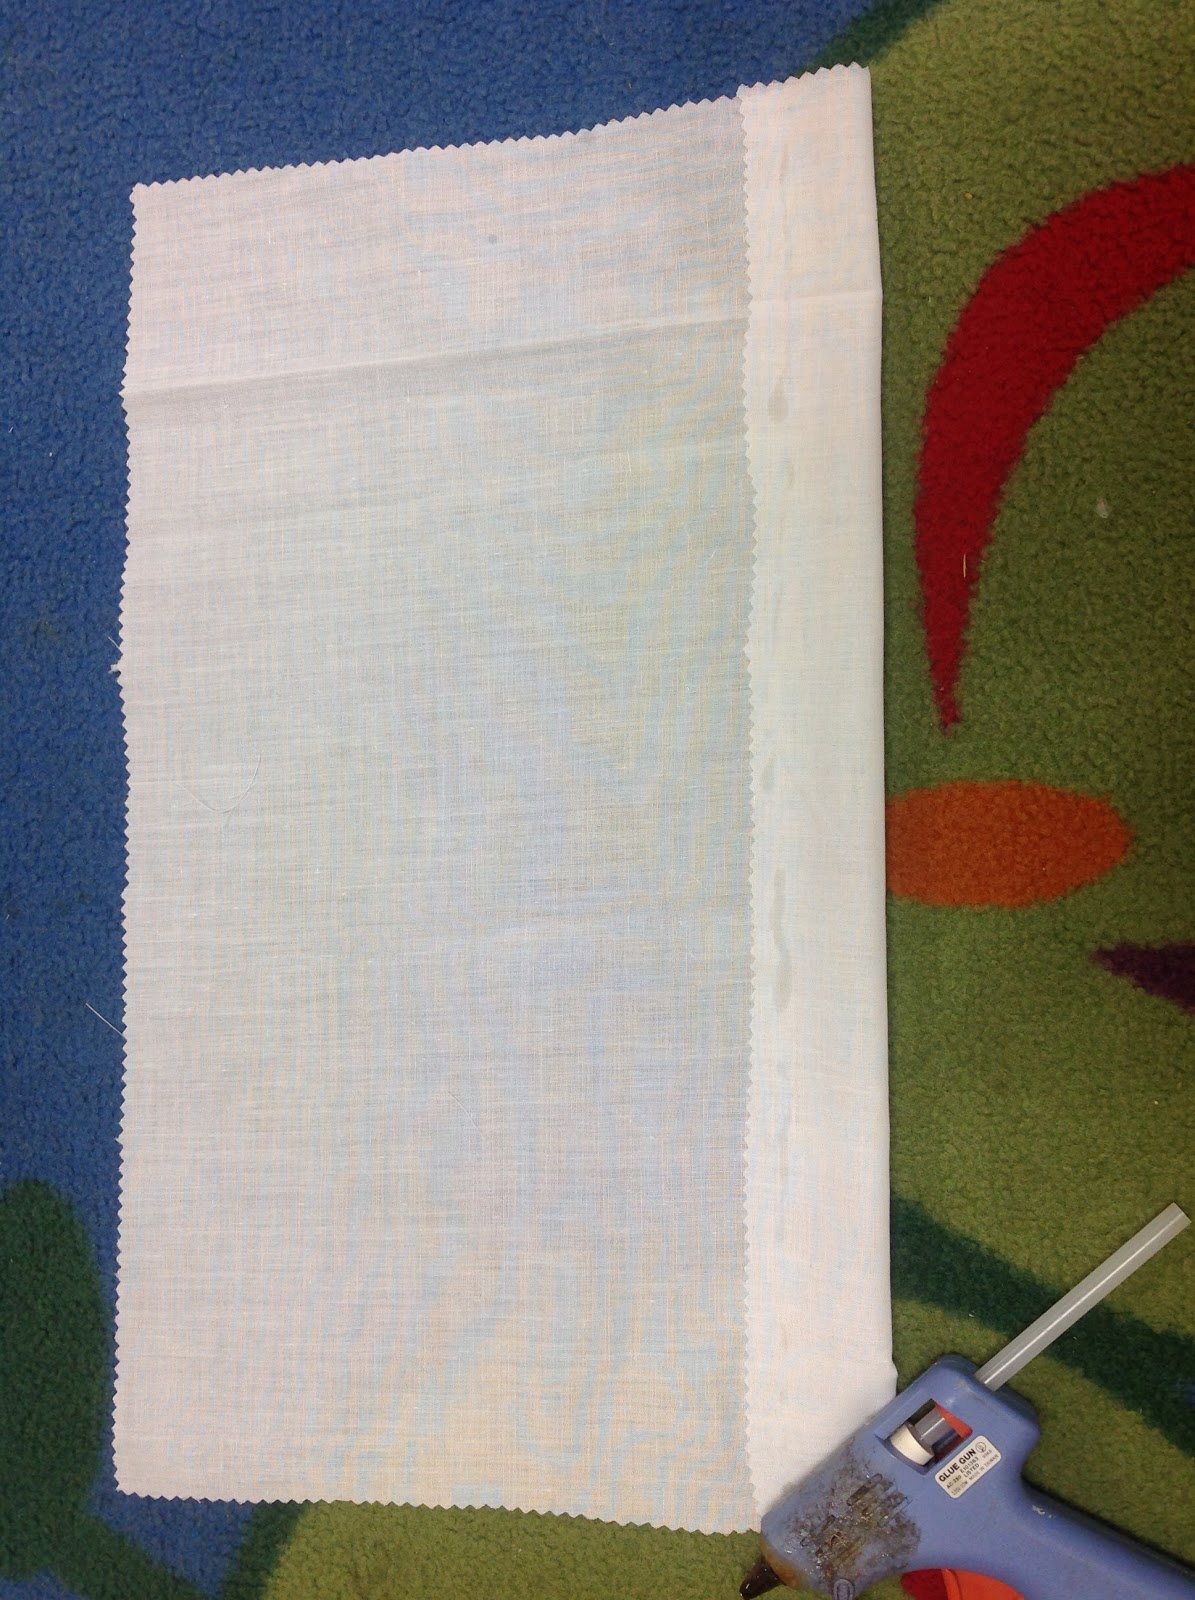
For the bonnets, I fold up one long edge about one inch and hot glue it together as shown above.

Next, I flip the bonnet over and fold each side down to form a triangle, and I hot glue a thin strip where the two sides fold down to meet.

This is just an image of the back

Then, I fold down the top corner and hot glue it to the back
Here is what the finished back looks like.


The last thing I add is two pieces of ribbon or string. I hot glue each string to the inside of the front folded edge. This is so the bonnet can be tied together. The string is probably about 5 inches long for each piece. You can see where it is tied in the image above. And, BAZINGA! You have a no sew girl bonnet.
NO SEW PILGRIM BOY/GIRL COLLARS
For the boy and girl collars, fold each piece in half so you will have a wide fold (not a skinny fold). Then, take the 12"x18" pieces and cut a 1-2" triangular notch in the center of each front. Then, cut out a circle in the middle of the folded piece for a child's head to fit through. Last, I hot glued a bow for the girls and a ribbon tie for the boys above the triangular notches. See the image at the very beginning of this post to view a finished collar.
INDIAN SHIRTS/NECKLACES

Pictured above is the finished product of shirts and necklaces.
I assign and sketch out an Indian name for each student along with a symbol that matches (Running Bear has bear footprints on shirt). I use sharpie markers to draw and color them in. On the back of each shirt, I let the kids draw their own Indian symbols. I provide a poster for them to look at of ideas.

For noodle Indian necklaces, I use alcohol, food coloring, and ziti noodles (uncooked :)). I pour about 1/2 package of noodles in a gallon ziplock bag along with about 1 cup alcohol and 10 or more drops of food coloring. I do this with all four colors. I flip bag several times over a 24 hour period to distribute color evenly, then drain, rinse, and set out on wax paper to dry. The kids then use yarn to string noodles for a necklace.
For Indian shirts, I use adult small or youth large t-shirts and then I cut about 2-3 inch strips at bottom and on sleeves (see image below of cut t-shirt). I then dye all the shirts after cutting them using dark brown RIT dye (in laundry aisle at Wal-Mart). Just follow directions on bottle or powder pack. I use the liquid dye. Works in a top loading washing machine....it is as easy as washing a load of clothes!


No comments:
Post a Comment